Playing with loggers

Shall we spend some time exploring a little bit about loggers? We shall! Let’s do it.

Visit the docs for more detailed information about the logging module. Let’s use a simple example, from the documentation, to illustrate the basic usage:

def simple_exmaple():
    # create logger
    logger = logging.getLogger('StreamHandler')
    logger.setLevel(logging.DEBUG)

    # create console handler and set level to debug
    ch = logging.StreamHandler()

    # create formatter
    formatter = logging.Formatter('%(asctime)s - %(name)s - %(levelname)s - %(message)s')

    # add formatter to ch
    ch.setFormatter(formatter)

    # add ch to logger
    logger.addHandler(ch)

    # 'application' code
    logger.debug('debug message')
    logger.info('info message')
    logger.warn('warn message')
    logger.error('error message')
    logger.critical('critical message')

Initially we’re creating a new logger and setting it’s level to DEBUG. You can check the log levels here (with this level we can use debug and above levels). In the next step we create a handler, determining where we want to log to. In this case StreamHandler  will log to the console. Next we setup a formatter for our output and add it to our handler.  Our handler is ready so we add it to our logger. At last, we take out logger for a test run.

What if we want to log to a file? Couldn’t be easier:

def with_file_handler():
    # create logger
    logger = logging.getLogger('FileHandler')
    logger.setLevel(logging.DEBUG)

    # create console handler
    fh = logging.FileHandler('with_file_handler.log')

    # create formatter
    formatter = logging.Formatter('%(asctime)s - %(name)s - %(levelname)s - %(message)s')

    # add formatter to fh
    fh.setFormatter(formatter)

    # add ch to logger
    logger.addHandler(fh)

    # 'application' code
    logger.debug('debug message')
    logger.info('info message')
    logger.warn('warn message')
    logger.error('error message')
    logger.critical('critical message')

Almost exactly the same, we only change the handler to a FileHandler and specify the log file name.

What if we want to log to both the console and a file? You can either use two loggers or add two handlers to the same logger. Let’s see how to accomplish the latter:

def with_both():
    # create logger
    logger = logging.getLogger('Both')
    logger.setLevel(logging.DEBUG)

    # create console handler and set level to debug
    ch = logging.StreamHandler()

    # create console handler and set level to debug
    fh = logging.FileHandler('with_both.log')    

    # create formatter
    formatter = logging.Formatter('%(asctime)s - %(name)s - %(levelname)s - %(message)s')

    # add formatter to ch
    ch.setFormatter(formatter)
    fh.setFormatter(formatter)

    # add ch to logger
    logger.addHandler(ch)
    logger.addHandler(fh)

    # 'application' code
    logger.debug('debug message')
    logger.info('info message')
    logger.warn('warn message')
    logger.error('error message')
    logger.critical('critical message')

It’s just a combination of the two previous examples. You can even a little bit further and use the root logger:

def with_root_logger():

    # create console handler and set level to debug
    ch = logging.StreamHandler()
    
    # create console handler and set level to debug
    fh = logging.FileHandler('with_root_logger.log')
    
    # create formatter
    formatter = logging.Formatter('%(asctime)s - %(name)s - %(levelname)s - %(message)s')

    # add formatter to ch
    ch.setFormatter(formatter)
    fh.setFormatter(formatter)

    # add ch to logger
    logging.getLogger().addHandler(ch)
    logging.getLogger().addHandler(fh)
    logging.getLogger().setLevel(logging.DEBUG)

    # 'application' code
    logging.debug('debug message')
    logging.info('info message')
    logging.warn('warn message')
    logging.error('error message')
    logging.critical('critical message')

Easy isn’t it? I hope this gives you a quick intro into the Python’s logging module. Don’t forget to visit the docs .
The bash bug

If you’ve following the news, here for example, you’re aware that there is a new bug out there. You can easily find information about it out there and how to fix it.

We’ve patching servers and although we have the most recent one’s managed with Chef some legacy one’s are not. As a good practice I script everything, so this time wasn’t an exception.

The script provided here as a gist, will help you check for the bug and patch it.

Because our servers are mostly Ubuntu servers, it’s only accounting for that. But you can easily change the script to suite your system.

Just a quick rundown of what it does.

  • it ssh’s into your server one by one and runs a test;
  • if the output of the test contains ‘vulnerable’ well, it’s vulnerable;
  • it then updates the repository and updates your bash.

For this script, I’m using Fabric. You can install it on your system, you you can create a virtualenv for the purpose. You can do:

$ virtualenv /path/to/env/folder
$ source /path/to/env/folder/bin/activate
$ pip install fabric

After that, get the code into any folder you desire (remember to name the file fabfile.py) and run:

$ fab check_bug

I hope it helps.

P.S. Of course, don’t forget yo update the hosts, user and key_filename to your own. Also, a check_bug.log is created in the same folder the file is run from. You can use that log to troubleshoot any problem that might arise.


HelloGlass

Recently I’ve messing around with a Google Glass and started working on a small prototype to interface Glass with our internal systems. Let’s build a very simple, Hello World style application, using the GDK.

The features of our application will be:

  • Add a command to the main menu;
  • Use voice  to trigger that command;
  • Launch an activity from that  trigger.

Let’s start by setting the string that will be added to the menu and be used as a trigger. That code lives in res/values/string.xml and res/xml/voice_trigger.xml.

On AndroidManifest.xml we will declare our activity and the service that will launch the activity on the voice command, along with linking the voice command we just created.

HelloGlassService.java will hold the code to launch the activity. onStartCommand will take care of launching our main activity.

MainActivity.java will be the activity that will display the default text.

So that this post didn’t get too long and bloated, I didn’t paste the code. But you can find it here. This example was built using Android Studio so you might be familiar with the file structure.

Have fun! Play and extend it.

P.S. Google states “Before you begin to use the GDK, you need intermediate or better knowledge in Android development.” I’m assuming the same here: that you have some knowledge and familiarity with Android development.

Speed, Speed, Speed!

I recently saw a talk from Brian Lonsdorf, where he talks about the obsession with speed in the JavaScript world. I have to say, I agree with him in many points. As a matter of fact, I don’t think it’s only in the JavaScript world (although it might be more evident nowadays) but it’s more or less generalized. It’s all about speed and scale!

Many of us have participated in discussions where an idea is being pitched and, it’s not even a full idea yet,  and people are already focussing on “if it scales”. Or someone ditching some nice abstraction because “this way it will be faster”.  It seems to be a current trend nowadays.

Brian makes (among many others) two points that I think are very interesting:

  1. even if you’re using some kind of abstraction, that does not mean that you can’t make your code more efficient. There are many ways to optimize your code before going into the “bare metal”;
  2. there are very smart people that deal with the “bare metal” daily, and doing a good job at it.

Let me derail a little bit to give an example. In Chapter 3  of his book, Practical Ruby for System Administration, Andre Ben Hamou talks about performance. In that chapter he has a cute little story about a competition between a Ruby and C developers where they aimed at writing some code to perform a task. Bottom line was, although the Ruby code was slower (although having enough performance for that specific job) it took a lot less time to write. He argues there that in order to go to a lower level (like having to resort to C code) there needs to be a very good reason. I couldn’t agree more.

I learnt that lesson the hard way. When I was still in college we had a class on Cryptography, where we had several assignments to do. Some of them involved cracking something and we were evaluated in the following way: first one to crack got 100%; the rest of people got a mark lower and lower depending on how much time they took to crack theirs after the first one (there was some kind of formula). Suffice to say the vast majority of us instead of coding something that would crack it, and leave it running (while we might still be improving our solution) , tried to find a “good solution”. Well, almost everyone gave up on that after the first assignment and it is a good example of what Andre was talking about in his book.

My post might have derailed a little bit from Brian’s original talk, but I think the broader concept is the same: there is so much focus on speed and scale nowadays, that we sometimes forget about maintainability. The war speed vs maintainability is old and will never end. But keep in mind speed sometimes means maintainability.

Think about it: you quickly have to make a fix for a critical bug. The easier it is to fix, the fastest you will make, the happier the client will be.

I encourage you to watch to Brian’s talk and spark some discussion about it.

Why not try Python 3?

So, you’ve been using Python 2 since forever right? Well, Python 2 is still strong but you will, eventually, have to move on. The will be no Python 2.8.

Python 3 is currently on version 3.4.1 and all of  us should at least try it out. Or maybe you want to try some other “Python flavor”, like PyPy for example. Virtualenv will help us.

Sure, you might be working professionally with Python 2 and you still want that to be your default. No worries. If you’re working with Python and not using virtualenv, well… You should use it! Even if you always use the same Python version, you should use it (I will not get tired of saying this). But let’s leave the discussion about using virtualenv for some other time and just accept, for now, that you should use it.

First thing, head to the downloads section and download the latest Python version. I’m writing this on a Mac, so I’ll get the OS X version. After the installation, check, on the command line that Python 3.4 is available:

 $ python3.4 -c “import sys; print(sys.version)”

3.4.1 (v3.4.1:c0e311e010fc, May 18 2014, 00:54:21)

[GCC 4.2.1 (Apple Inc. build 5666) (dot 3)]

Now we will create a virtual environment that will have Python 3.4 as it’s interpreter. We can achieve that by using the “-p”  parameter. But first, let’s locate the path to of your “new” Python:

$ which python3.4

/Library/Frameworks/Python.framework/Versions/3.4/bin/python3.4

Now that we know the path to Python 3.4, we can create our environment:

$ virtualenv -p /Library/Frameworks/Python.framework/Versions/3.4/bin/python3.4 /path/to/the/env

Running virtualenv with interpreter /Library/Frameworks/Python.framework/Versions/3.4/bin/python3.4

Using base prefix ‘/Library/Frameworks/Python.framework/Versions/3.4’

New python executable in /Users/rcastro/.envs/test_python3.4/bin/python3.4

Also creating executable in /Users/rcastro/.envs/test_python3.4/bin/python

Installing setuptools, pip…done.

Let’s activate our new environment and check that Python 3.4 is our default:

$ source ~/.envs/test_python3.4/bin/activate

(test_python3.4)$ python -c “import sys; print (sys.version)”

3.4.1 (v3.4.1:c0e311e010fc, May 18 2014, 00:54:21)

[GCC 4.2.1 (Apple Inc. build 5666) (dot 3)]

Excellent. This way you can even work with different versions on different projects. Cool, uh?

LAMP development environment

Disclaimer: I'm not a PHP developer. Any of the practices here described do not claim to be "good practices". Improvements and/or other solutions, tricks and tips are much appreciated.

A while back I was asked for some support/analysis on a PHP web application (CakePHP to be a little more specific) . Well, my knowledge of PHP is (to be kind!) limited. Apart for some PHP coding back in college I never had any professional experience with it nor with any of it’s frameworks.

Moving forward, I setup a LAMP environment using XAMPP. Due to my own lack of knowledge and lack of documentation it wasn’t long before I started running into some trouble (database connection was “shaky”, cake command was not working properly, etc). I need another approach.

I could have setup a LAMP server on my own machine but I had a couple of reasons not to:

  • I don’t like installing software system wide unless I used it frequently;
  • I like keep development environments as self contained as possible and make dependencies manageable.

I usually work with Python and PostgreSQL, but the LAMP stack comes in handy sometimes. Because it saves me time (and headaches, for the matter) I like keep things as automated/replicable as possible. With this in mind I turned once again to Vagrant and VirtualBox for help (you need to install them both before you proceed). So our development server requirements, for this example, are:

  • LAMP server – Linux, Apache, MySQL and PHP;
  • WordPress development;
  • We want to write code on our host machine and see the results immediately on the browser (like when we use Django or Rails own development servers).

For that purpose, I setup a repository on Github with an initial configuration. Let’s begin!

Get into the folder you would like the code to live and run:

cd /folder/where/the/code/will/live

git clone https://github.com/mccricardo/lamp_server

This will create a folder called lamp_server with the contents of the repository. You can rename it to whatever you want. Let’s look at our bootstrap file:

#!/usr/bin/env bash

export DEBIAN_FRONTEND=noninteractive

echo "Update repos"
apt-get update

echo "Install apache"
apt-get install -y apache2 apache2-mpm-worker

echo "Install MySQL"
apt-get install -y mysql-server libapache2-mod-auth-mysql php5-mysql

echo "Activate MySQL"
mysql_install_db

echo "Install PHP"
apt-get install -y php5 libapache2-mod-php5 php5-mcrypt

This will install our LAMP server dependencies. Please note that MySQL will be installed with a root user without password. For this example will will leave it like that, but you should change it in the future.

Let’s take a look at the Vagrantfile:

# -*- mode: ruby -*-
# vi: set ft=ruby :

# Vagrantfile API/syntax version. Don't touch unless you know what you're doing!
VAGRANTFILE_API_VERSION = "2"

Vagrant.configure(VAGRANTFILE_API_VERSION) do |config|

  config.vm.box = "precise64"
  config.vm.box_url = "http://files.vagrantup.com/precise64.box"

  config.vm.provision :shell, :path => "bootstrap.sh"
  config.vm.network "forwarded_port", guest: 80, host:8080

  config.vm.provider :virtualbox do |vb|
      vb.customize ["modifyvm", :id, "--memory", "1024"]
  end
end

The VM will have a Ubuntu 12.04LTS OS, will listen on port 8080 and will have 1GB of memory. You can change all of these as you require. You can also give the VM a name by adding the following line, below vb.customize:

vb.name = “Name You Desire”

Next step, run:

vagrant up

The initial setup will go through. Wait for a little while and at the end you’ll have your LAMP server up and running. For a sanity check, go to http://localhost:8080/ and see if it works. It does? We’re moving fast. Let’s proceed.

Next we get WordPress. Download for the link provided and extract to the same folder as before (the folder will live next to the Vagrantfile and reaming files). We want that folder, because good old Vagrant keeps that folder synced with one inside the VM. That way we can write code from our host and the server will be able to server it from the VM  without any fuss. Don’t believe me? The do:

vagrant ssh

ls /vagrant/

 Trust me now? Good 🙂 We’re approaching  the end.  We now need to tell Apache where to find our code.

Edit the file /etc/apache2/sites-available/default so that it points to our WordPress code:

DocumentRoot /vagrant/worpress
<Directory />
Options FollowSymLinks
AllowOverride None
</Directory>
<Directory  /vagrant/worpress/>
Options Indexes FollowSymLinks MultiViews
AllowOverride None
Order allow,deny
allow from all
</Directory>

Restart apache: sudo service apache2 restart

You can now follow the Famous 5-Minute Install to setpup WordPress.  Et voila! You now have a LAMP server with a fully functional WordPress installation.

Merge Sort in Scala

Following my last post, on Merge Sort, I decided to try out a possible implementation in Scala. Furthermore we’ll see here a parametrized implementation, to sort lists of any type.  My previous post on the subject was aimed at explaining the algorithm and was exemplified, for simplicity, with a concrete example for lists of integers. Let’s extend that.

As a first step, let’s start simple and analyse a possible implementation only lists of integers.

def msort(xs: List[Int]): List[Int] = {
  def merge(xs: List[Int], ys: List[Int]): List[Int] = (xs, ys) match {
    case (Nil, ys) => ys
    case (xs, Nil) => xs
    case (x::xs1, y::ys1) =>
        if (x < y) x :: merge(xs1, ys)
        else y :: merge(xs, ys1)
    }
  		
    val n = xs.length / 2
    if (n == 0) xs
    else {
      val (fst, snd) = xs splitAt n
      merge(msort(fst), msort(snd))
    }
}                      

Let’s go through this. The first piece of code is the definition of the merge function. This function uses pattern matching on the input list to check the 3 possible cases:

  • the first list is empty so the merge result is the second one;
  • the second list is empty so the merge result is the first one;
  • they both have elements, so we need to check which of the first element of each list is smaller (it then becomes the head of the result list) and proceed with the remaining elements.

mSort will then determine the middle of our list and if the result is then, we either have an empty list or a list with only 1 element. That being the case the list is sorted. If not we split it at that element and recursively sort each half.

Next step, we want to make this a little bit more generic. Let’s see how we would go about that.

def msort[T](xs: List[T])(lt: (T, T) => Boolean): List[T] = {
  def merge(xs: List[T], ys: List[T]): List[T] = (xs, ys) match {
    case (Nil, ys) => ys
    case (xs, Nil) => xs
    case (x::xs1, y::ys1) =>
      if (lt(x, y)) x :: merge(xs1, ys)
      else y :: merge(xs, ys1)
  }
  		
  val n = xs.length / 2
  if (n == 0)
    xs
  else {
    val (fst, snd) = xs splitAt n
    merge(msort(fst)(lt), msort(snd)(lt))
  }
}

As we can see the code is fairly similar to the previous one. We replaced the Int type for a generic type  T. The most “strange” part of it is the  (lt: (T, T) => Boolean). So, what does that do? In the first example, the way we found out if an element is smaller than another was to use the implicit function for integers. Since we’re now using a generic function, we need to supply that function. So, a function call for our function would be something like:

val nums = List( 2, 5 , 23, 1, -4)
msort(nums)((x: Int, y: Int) => x < y)

Can we go a little bit further? Having to pass around those “ugly” compare functions is rather boring. Let’s take another step.

import math.Ordering

def msort[T](xs: List[T])(implicit ord: Ordering[T]): List[T] = {
  def merge(xs: List[T], ys: List[T]): List[T] = (xs, ys) match {
    case (Nil, ys) => ys
    case (xs, Nil) => xs
    case (x::xs1, y::ys1) =>
      if (ord.lt(x, y)) x :: merge(xs1, ys)
      else y :: merge(xs, ys1)
  }
  		
  val n = xs.length / 2
  if (n == 0)
    xs
  else {
    val (fst, snd) = xs splitAt n
    merge(msort(fst), msort(snd))
  }
}

math.Ordering “defines many implicit objects to deal with subtypes of AnyVal (e.g. Int, Double), String, and others”. We can leverage this by using it’s lt (less than) function for comparing elements. By declaring it as an implicit  parameter, we’re just asking the compiler to figure out the correct function to use. We can now call our functions like this:

val nums = List( 2, 5 , 23, 1, -4)
msort(nums)

Just like we wanted. Simpler and less cumbersome. No need to pass that lt function any more.

Merge Sort: let’s sort!

Sorting has always been a popular subject in Computer Science. Back in 1945 Mr. John von Neumann came up with Merge Sort. It’s an efficient divide and conquer algorithm, and we’ll dive right into it.

The general flow of the algorithm comes as follows: (1) divide the list into lists of size 1 (being the size of the original list), (2) recursively merge them back together to produce one sorted list.

As usual, I always get things better with an example. Let’s transform this (kind of) abstract explanation into a concrete example. We’ll use a simple, yet descriptive, example for sorting lists of integers. Let’s start with (1).

def merge_sort(list):

    if len(list) <= 1:
        return list

    return merge(merge_sort(list[:len(list)/2]), merge_sort(list[len(list)/2:]))

Here we have part 1. Basically what we’re doing here is to check  at each step if our list is already of size 1 and ff it is  we return it. If not, we split it in half, call merge_sort on each of them and call a function merge with both halves. How many times will this merge function be called? log n because we’re splitting the list in half at each time.

Next, phase number (2). We need to merge everything back together.

def merge(l1, l2):
    result = []
    i, j = 0, 0

    while i < len(l1) and j < len(l2):         
        if l1[i] > l2[j]:
            result.append(l2[j])
            j += 1
        else:
            result.append(l1[i])
            i += 1

	result += l1[i:]
	result += l2[j:]

	return result

So, what’s going on here? We know that we start with lists of size 1. That means that at each step, each of the 2 lists will be sorted on it’s own. We just need to stitch them together. That means that we go through the lists (until we reach the end of at least one) and we get  the smallest element at each step. When one of them  ends, we just need to add the remaining elements of the other to the result.

We already know that this merge will be called log n times. But at each call merge does comparisons because it needs to figure out where the all the elements fit together. So Merge Sort is a O(n log n) comparison sorting algorithm

Concurrent vs Parallel

In a world where we hear and talk a lot about making code run concurrent or in parallel, there’s sometimes a little bit of confusion between the two. It happens that many times we use one term when referring to the other or even use them indistinguishably. Let’s shed some light on the matter.

When we say that we have concurrency in our code, that means that we have tasks running in periods of time that overlap. That doesn’t mean that they run at the exact same time. When we have parallel tasks that means that they they run at the same time.

In a multi-core world it might seem that concurrency doesn’t make sense, but as everything, we should the right approach for the job at hand. Imagine for example a very simple web application where one thread handles requests and another one handles database queries: they can run concurrently. Parallelism  has become very useful in recent times in the Big Data era, where we need to process huge amounts of data.

Let’s see an example of each, run and compare run times.

Concurrent:

from threading import Thread

LIMIT = 50000000

def cycle(n):	
    while n < LIMIT:
	n += 1

t1 = Thread(target=cycle,args=(LIMIT/2,))
t2 = Thread(target=cycle,args=(LIMIT/2,))
t1.start()
t2.start()
t1.join()
t2.join()

Parallel:

from multiprocessing import Process

LIMIT = 50000000

def cycle(n):	
    while n < LIMIT:
	n += 1

p1 = Process(target=cycle, args=(LIMIT/2,))
p2 = Process(target=cycle, args=(LIMIT/2,))
p1.start()
p2.start()
p2.join()
p2.join()

Now, the times to run:

$ time python concurrent.py

real0m4.174s

user0m3.729s

sys0m2.272s

$ time python parallel.py

real0m1.764s

user0m3.422s

sys0m0.027s

As we can see, the parallel code runs much faster than the concurrent. Which accordingly to what was said previously makes sense,doesn’t it? In this example, we can only gain time if the tasks run simultaneously.

Your programming language of choice will give the tools needed to implement both the approaches. Analyze you problem, devise a strategy and start coding!

P.S. Please note, that an imperative implementation would run faster than the concurrent one due to the Python’s GIL.

Django and Jenkins

If you’ve read (and followed) two of my previous posts, A small help to get you into Continuous Integration and Let’s link Jenkins and Github together, by now you have a Jenkins server linked to a Github repository. While those two posts were a little bit more generic, this one will focus on building Django projects. Let’s call it Part 3 of this series.

Building a Django project in a CI environment involves several steps. From installing all dependencies (virtualenv is a must) , rebuilding you database (you should always be in the position where you can make a deploy from scratch and that involves,of course, rebuilding you database), run tests, generate reports, etc. Please read this excellent article  about Continuous Integration from Martin Fowler. It’s worth your time!

As you can see there are a lot of steps involved so it would be best if we script it all once and use many times, wouldn’t it? We’ll with Django that’s even simpler because django-jenkins  allow’s “Plug and play continuous integration with Django and Jenkin “. Sweet! Let’s add the following packages to our requirements file:

  • django-jenkins
  • coverage – code coverage measurement from Python
  • pylint – Python code static checker

Let’s update our settings file with the following settings:

INSTALLED_APPS += (
    'django_jenkins',
)

JENKINS_TASKS = (
    'django_jenkins.tasks.run_pylint',
    'django_jenkins.tasks.with_coverage',
)

PROJECT_APPS=(
    'demo_app',
)

Armed with these tools, django-jenkins “knows” what to do. It knows how to run tests and how to generate reports. PROJECT_APPS will tell Jenkins only to build reports to our apps, excluding Django own code reports. What we need now is to tell Jenkins what to do. Let’s do that.

First thing we nee to do is install the required plugins: Violations for parsing the pylint reports and Cobertura to get the code coverage reports. As we’ve seen in the previous posts, that’s done via the Manage Jenkins -> Manage plugins -> Available.

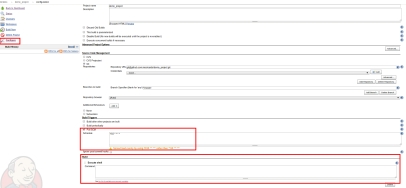
Next steps will involve pooling the Github repository and adding a build step. Click Configure and on Pool SCM let’s make it poll every ten minutes (cronjob syntax). On the Build section, select Execute shell and will add a shell script to automate the process.

8

Next step: build script. Add this script to the text area:

#!/usr/bin/env bash

virtualenv ve
source ./ve/bin/activate
pip install -r requirements.txt
python manage.py syncdb
python manage.py jenkins

Let’s break down this script into steps:

  • first, we create the environment to install all our dependencies;
  • next we install all dependencies from our requirements file;
  • following, we build our database. In this example we simply sync our models;
  • at last we  run django-jenkins.

This last step will generate the reports. We now need to tell Jenkins where they live so that they can be parsed: test results,  test coverage reports and pylint reports. Again in Configure, go to Add post-build-action and select:

  • Publish JUnit test  result report
  • Report Violations
  • Publish Cobertura coverage report

When django-jenkins runs, it creates a reports folder where reports are generated into. We just need tell Jenkins to find the required reports there.

9

Now, every  10 minutes Jenkins will poll Github and if there are changes, it will build and generate reports.

10

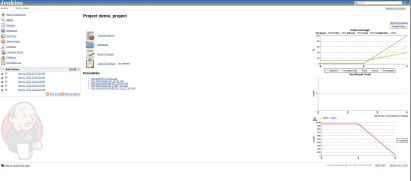
The evolution in the graphs are the result of several builds. Please note, that if your app has no tests the build will always fail.

Now you’re ready to go. CI world is at your feet. Conquer it!