Django and Jenkins

If you’ve read (and followed) two of my previous posts, A small help to get you into Continuous Integration and Let’s link Jenkins and Github together, by now you have a Jenkins server linked to a Github repository. While those two posts were a little bit more generic, this one will focus on building Django projects. Let’s call it Part 3 of this series.

Building a Django project in a CI environment involves several steps. From installing all dependencies (virtualenv is a must) , rebuilding you database (you should always be in the position where you can make a deploy from scratch and that involves,of course, rebuilding you database), run tests, generate reports, etc. Please read this excellent article  about Continuous Integration from Martin Fowler. It’s worth your time!

As you can see there are a lot of steps involved so it would be best if we script it all once and use many times, wouldn’t it? We’ll with Django that’s even simpler because django-jenkins  allow’s “Plug and play continuous integration with Django and Jenkin “. Sweet! Let’s add the following packages to our requirements file:

  • django-jenkins
  • coverage – code coverage measurement from Python
  • pylint – Python code static checker

Let’s update our settings file with the following settings:

INSTALLED_APPS += (
    'django_jenkins',
)

JENKINS_TASKS = (
    'django_jenkins.tasks.run_pylint',
    'django_jenkins.tasks.with_coverage',
)

PROJECT_APPS=(
    'demo_app',
)

Armed with these tools, django-jenkins “knows” what to do. It knows how to run tests and how to generate reports. PROJECT_APPS will tell Jenkins only to build reports to our apps, excluding Django own code reports. What we need now is to tell Jenkins what to do. Let’s do that.

First thing we nee to do is install the required plugins: Violations for parsing the pylint reports and Cobertura to get the code coverage reports. As we’ve seen in the previous posts, that’s done via the Manage Jenkins -> Manage plugins -> Available.

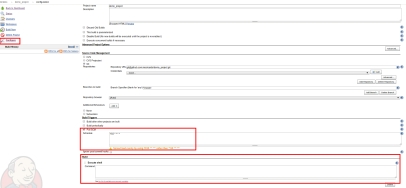
Next steps will involve pooling the Github repository and adding a build step. Click Configure and on Pool SCM let’s make it poll every ten minutes (cronjob syntax). On the Build section, select Execute shell and will add a shell script to automate the process.

8

Next step: build script. Add this script to the text area:

#!/usr/bin/env bash

virtualenv ve
source ./ve/bin/activate
pip install -r requirements.txt
python manage.py syncdb
python manage.py jenkins

Let’s break down this script into steps:

  • first, we create the environment to install all our dependencies;
  • next we install all dependencies from our requirements file;
  • following, we build our database. In this example we simply sync our models;
  • at last we  run django-jenkins.

This last step will generate the reports. We now need to tell Jenkins where they live so that they can be parsed: test results,  test coverage reports and pylint reports. Again in Configure, go to Add post-build-action and select:

  • Publish JUnit test  result report
  • Report Violations
  • Publish Cobertura coverage report

When django-jenkins runs, it creates a reports folder where reports are generated into. We just need tell Jenkins to find the required reports there.

9

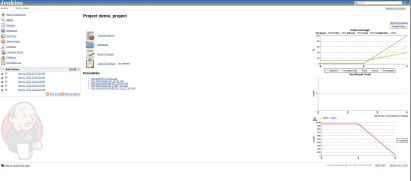
Now, every  10 minutes Jenkins will poll Github and if there are changes, it will build and generate reports.

10

The evolution in the graphs are the result of several builds. Please note, that if your app has no tests the build will always fail.

Now you’re ready to go. CI world is at your feet. Conquer it!
Stacks and Queues: containers for all!

Stacks and Queues are two types of containers and as the name says, they’re used to store content. Predictable, uh? So what’s the difference between them, you might ask. Well Sir (or Madam), it’s the way data is retrieved.

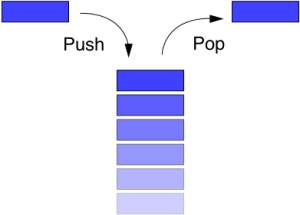
Stacks support what we call LIFO (Last In, First Out). Elements are inserted at the top/end of the container, usually called push and retrieved from the same position, usually called pop.

stack

Let’s see how we could implement this in Python:

class Stack:
    """ Simple stack implementation. """
    def __init__(self):
        self.stack = []

    def push(self, elem):
        """ Add an element to the stack. """
        self.stack.append(elem)

    def pop(self):
        """ Remove element from stack. """
        self.stack.pop()

    def get_stack(self):
        """ Get current stack. """
        return self.stack

This generic implementation is simple but serves as an example of how we could implement a Stack.

Then we have Queues which are similar, but support what we call FIFO (Fast In, First Out). Elements are inserted at the bottom/end of the container, usually called enqueue and retrieved from the first position, usually called dequeue.

queue

Let’s see how we could implement this. Yes, that’s right, in Python:

class Queue:
    """ Simple queue implementation. """
    def __init__(self):
        self.queue = []

    def enqueue(self, elem):
        """ Add an element to the queue. """
        self.queue.append(elem)

    def dequeue(self):
        """ Remove element from queue. """
        return self.queue.pop(0)

    def get_queue(self):
        """ Get current queue. """
        return self.queue

Similar implementations, but as expected a different way of retrieving the data. As we can see, both containers can be efficiently implemented using lists/arrays. Also, we made use of Python’s append and pop methods for lists in order to insert and retrieve elements. Why reinvent the wheel?

Please note that theses data structures accept any kind of valid data simultaneously (integers, floats, arrays, strings, etc).

Let’s link Jenkins and Github together!

If you read A small help to get you into Continuous Integration you now have a server running Jenkins and you’re ready to start doing CI. Let’s hook it up with Github.

First step is to install the necessary plugins. Let’s go over to Manage Jenkins -> Manage Plugins.

Here, click Available and type Github in the search box. Select the Github plugins.

2


To be sure, let’s restart Jenkins. You might need to refresh the page once it’s over.


3

Let’s create an example project. On the main screen click New Item. Give your project a name and select Build a free-style software project.

4

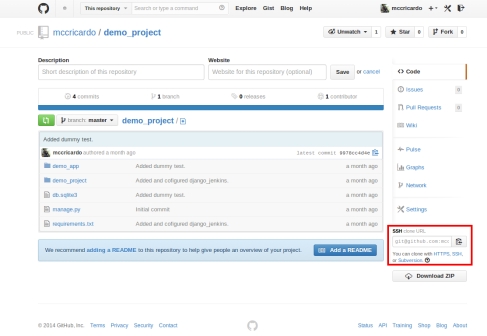
Go to your Github repository and on the right side select ssh and copy the URL

5

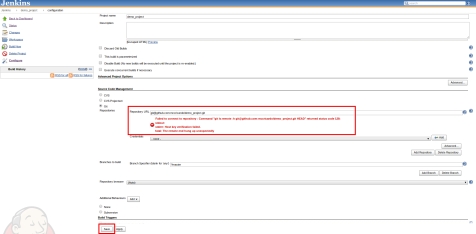
In Jenkins again, under Source code management select Git  and paste the URL in Repository URL.

6

If you move the cursor to any other place you’ll notice the red error message. This one was on purpose to make you aware of the next step. What this means is that Jenkins was unable to connect to Github. We need to let Github “know” about you Jenkins server. Click Save and let’s see how to do that.

Go to the folder where whe vagrant files live and type:

$ vagrant ssh

Once your in, let’s access you jenkins user by typing:

$ sudo su – jenkins

You’re now ready to generate an ssh key. Type the following command and follow the instructions:

$ ssh-keygen

If you followed the default instructions, you now have a public key. Get it by typing:

$ cat .ssh/id_rsa.pub

You should see something similar to this:

ssh-rsa AAAAB3NzaC1yc2EAAAADAQABAAABAQCq2Asfk/kdYaBf5h4cX+BFRDEtZFnIv2tcBPklN+obUvclhEVt0n7yZ+MLsTDownSSOrPZwqxnIj0FRUJ4Hj8Hx/jZlCf7V5s3kIA+FHvHIfaBiKAhCdnqtNflHe03bO0MTciSlYcQVwAR8JYBwk/8Alr2/sR7Rbwu+05NiTJ0xb6Y54OTtYHitHqrDaHKMaJSkLRnjzMlZ3vcHpckgGyyZd8NiRNRX0XL2pDG21C+nQyGLu9GjKJh0ixxk3E5lgpvj/w4pFOxozIswpTzf6oXqaELoK3Y0zHwNvFyAgY3Thn+tWGPlD3a0OLcsNqB8Pa8XP04Bo0fRW/6L+1trLE5 jenkins@precise64

Copy your public key and go over to your Github project.  On the right hand side click Settings and then Deploy Keys -> Add deploy key. In the form give a name to your key, and paste the public key you got from your Jenkins server.

7

Back to your shell, let’s check that we can access Github by typing (say yes when a asked):

$ ssh -T git@github.com

You should receive a message similar to:

Hi mccricardo/demo_project! You’ve successfully authenticated, but GitHub does not provide shell access.

That’s all folks. If you don’t trust me, click Configure on the left and verify that the error message disappeared. You’re now one step further into CI.